Having replaced the large Arduino Mega with the new Sodaq Ndogo, there was now plenty of room inside the buoy to include all the extra sensors (yet another excuse to spend hours with CAD). Also, after researching static o-ring seals I have decided to test the spherical buoy design once more and integrate a 3/16″ thick gland into the lower portion of the buoy hull. The project will also use RTV as a backup to the o-ring in case the PLA is not stiff enough to properly compress the o-ring. Below is an exploded view of the new assembly.
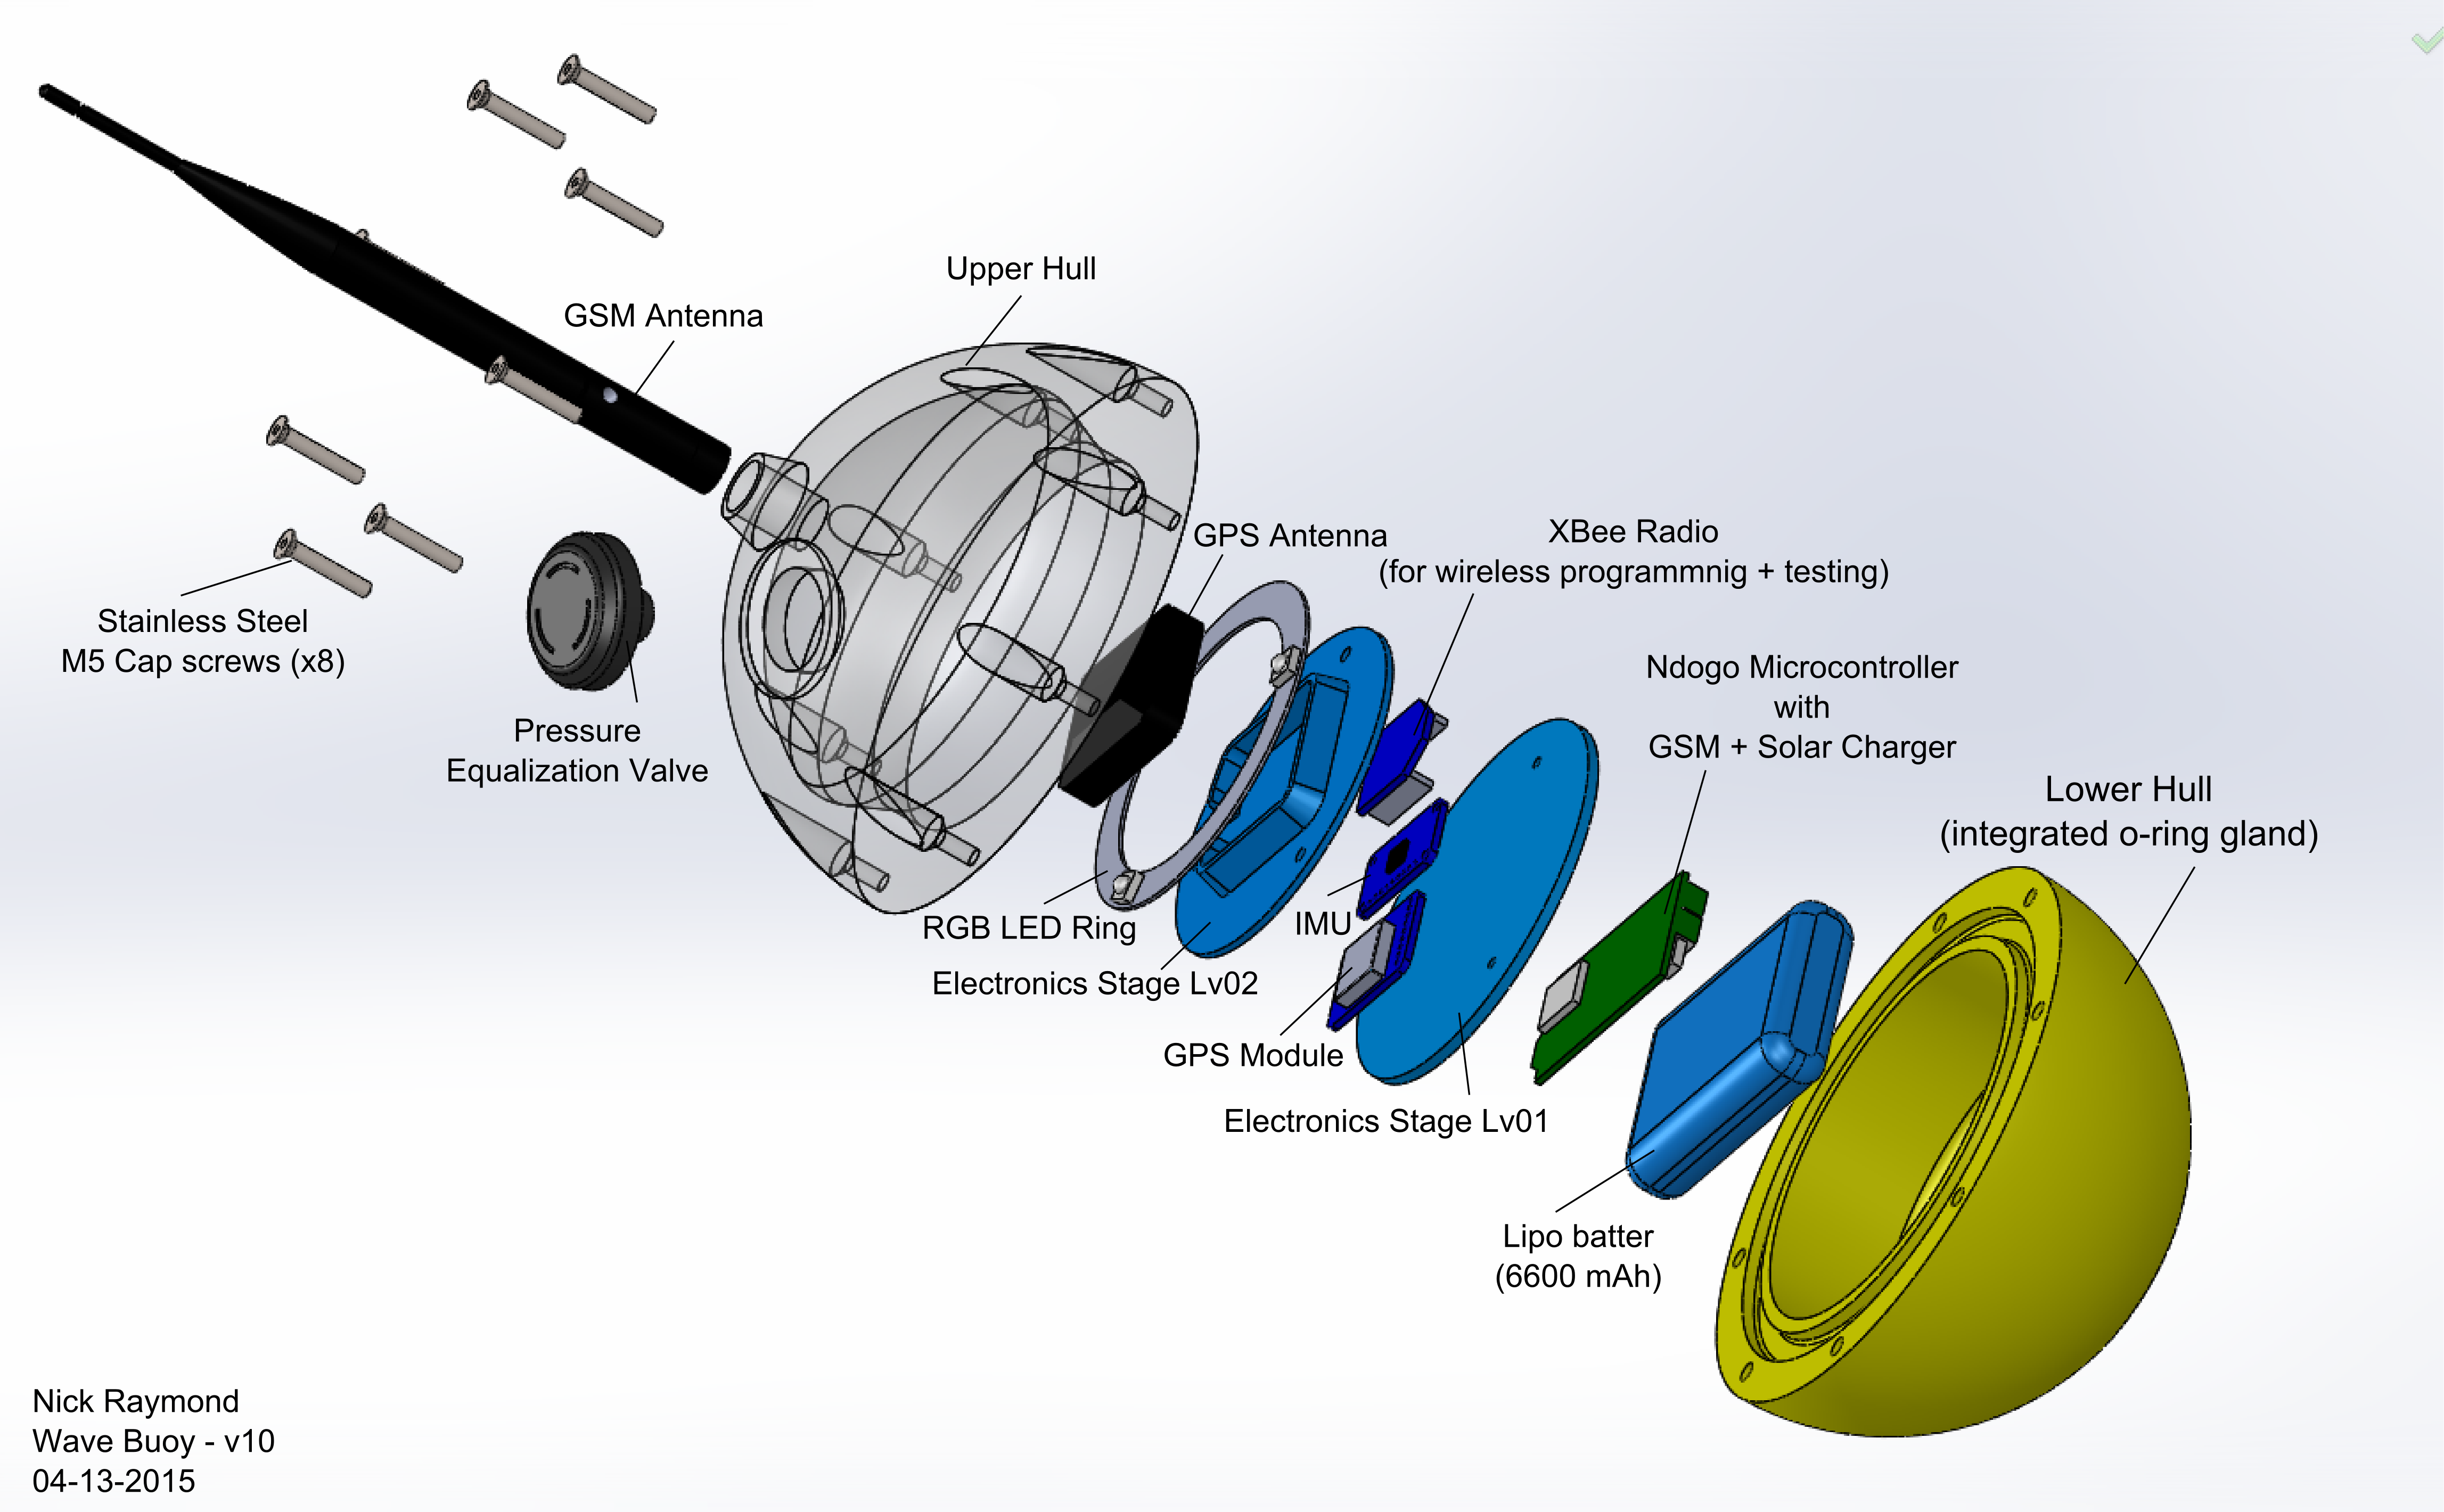
The top portion of the buoy hull will be 3D printed from a clear filament material so that the light from the three RGB LEDs will illuminate the shell at night and cause the top half to glow. Additionally, to avoid extreme temperature and pressure gradients from developing inside the buoy a special pressure equalizing valve (similar to those found on Pelican cases) will be added to the top portion of the hull. As the pressure changes inside the buoy due to heating/cooling cycles throughout the day the valve will allow air to enter/exit but prevent water form entering. This will prolong the life of the electronics and most importantly prevent the seal from failing due to an internal negative pressure.

So far the bottom portion (yellow) hull has been very difficult to print due to the large overhang at the very bottom of the part. Due to the internal features of the part, I had planned to print the part with the o-ring gland face up (there is a small flat on the bottom of the hemisphere for printing) however the part would warp and eventually the printer head would strike with the part and eject it from the printing bed. To avoid the warping, I split the bottom half of the buoy hull into two separate pieces and then printed them individually. So far, the print seems to be working ok.

